Kaabo Skywalker 10C User Guide
Section Navigator
Know what you need? Ride straight to it.

Introduction
The Kaabo Skywalker series encompasses a range of electric scooters designed for urban commuting and general use. Key models include the Skywalker 8H and Skywalker 10C, each offering a balance of performance, portability, and features. These scooters typically feature powerful motors, decent battery ranges, and robust build quality suitable for city riding. This user guide focuses on the Kaabo Skywalker 10C model that has a wider deck and larger wheels than its other Skywalker siblings. The number 10 in the 10C represents the wheel size, that is 10-inches.
Product Diagram


Safety Instructions
This section is crucial for your safety and the longevity of your electric scooter. Please read and understand all the safety instructions before your first ride. Jerung Wheels will not be held responsible for any damage, injury, or legal issues resulting from misuse or neglect of these safety guidelines.
General Safety Guidelines






-
Do Not Ride in Rainy Conditions
Water can damage electrical components and increase the risk of slipping. Always ride in dry weather. -
Avoid Self-Repairs
Attempting repairs without proper knowledge may lead to electric shock or further damage. Always consult authorized technicians. If your electric scooter is misbehaving, please send it to our award winning Jerung Medic after-sales service centre. -
Obey Local Traffic Laws
Respect local regulations regarding electric scooter usage, including speed limits and allowed zones. -
No Stunts or Acrobatics
This scooter is built for commuting, not tricks. Performing stunts may lead to serious injury. -
One Rider Only
Never allow more than one person to ride the scooter at a time. -
Wear Safety Gear
Always wear a helmet, gloves, and elbow/knee pads for protection during your ride. -
Practice Before Riding on Roads
Start in an open, obstacle-free area to get comfortable with the electric scooter before venturing into traffic. -
Adjust Handlebar Height
If you have an adjustable pole, ensure the T-bar is adjusted to a comfortable height to maintain control and avoid injury. -
Charge Before First Ride
Fully charge the electric scooter before using it for the first time to optimize battery performance. -
Never Power Off While Riding
Turning off the electric scooter mid-ride can result in loss of control. -
Avoid Large Steps or Curbs
Do not attempt to climb steps higher than 3 cm, as this could cause tipping and injury. -
Mind the Temperature
Use and store the electric scooter in environments between -5°C and 50°C for optimal performance and battery life. -
Monthly Charging for Long-Term Storage
If the electric scooter is unused for long periods, charge it at least once a month to preserve battery health. -
Avoid Deep Water and Spraying
Do not ride through puddles deeper than 5 cm or expose the electric scooter to direct water spray. This can cause electrical failures. -
Keep Both Feet on the Deck
Always stand with both feet firmly on the deck while riding to maintain balance and control.
Exceeding local speed limits or ignoring traffic laws can result in injury or legal consequences. Ride responsibly at all times.
Folding & Unfolding
Before hitting the road, it’s important to know how to properly open and fold your Kaabo Skywalker 10C electric scooter. Follow these steps to ensure your ride starts and ends smoothly.
Always make sure the folding lock is fully secured before riding. An unlocked mechanism can cause serious accidents.
How to Fold the Kaabo Skywalker 10C
Release the seat latch and take it out from the seat pole. Next, release the base latch. Then, press the notch and fold the seat pole
Release the safety pin located near the folding hinge. Then, fold up the kickstand to keep it out of the way during the folding process. Now, step firmly on the folding latch until you hear a click. This means the scooter is securely folded.
Release the latch on the handlebar pole to unlock the height adjustment. Slide the handlebar pole downwards to its lowest position. Once it’s in place, lock the latch securely. Pull the circular lock on the left side to fold the handlebar inward. Repeat the same step on the right side to complete the fold.
How to Unfold the Kaabo Skywalker 10C
Unfold both handlebars until they’re secured in place. Then, step on the folding latch and lift the scooter upright until you hear it click into the unfolded position. Engage the safety pin, and drop the kickstand.
Lift the seat up, make sure the notch clicks in, and secure the latch underneath to lock it firmly. Insert the seat pole into the mount and lock the seat pole latch to hold it at your desired height.
Adjust the handlebar pole to a comfortable height and lock the latch to secure it. You’re now ready to ride.
Display & Settings (LT01)

This scooter is equipped with an LT01 display throttle. It has a beautiful color screen to display the necessary information at a quick glance. It also has a Type-A USB port on the side that adds the convenience of charging your devices while on the go.
Display Parameters
 Power Button – To turn the electric scooter ON or OFF, press the power button for 3 seconds.
  Mode Button – The mode button allows you to toggle through different display parameters when the electric scooter is turned ON. The available parameters are further elaborated below.
- GEAR – This electric scooter can be switched between three gears. Think of it as a “speed limiter” where gear 1 sets the electric scooter to its slowest speed while gear 3 sets it to the highest speed. Unlike conventional vehicles where you have to start with the lower gear and shift to the higher one as you move, electric scooters allow you to start with the top gear right away if you want to. You would want to switch to lower gear when you are riding in a busy area and use a higher gear when the street is less crowded.
- Speed-o-meter – The two large digits on the display shows the speed that the electric scooter is cruising at.
- Battery Indicator – The battery indicator shows a rough estimate of the battery level of the electric scooter. Typically, when the battery drops down to the last block, you should be getting ready to recharge the electric scooter.
- Throttle – The throttle stick functions as the electric scooter’s accelerator. It is a variable throttle, which means, the electric scooter’s speed changes according to how deep the throttle is pressed. If the “kick start” mode is enabled (indicated by the “Zero” icon on the display), you will need to give the electric scooter a gentle push to glide before pressing the throttle to get it moving.
Don’t wait for the battery to fully drain. Recharge the scooter when there’s only one or two bars left to help protect the battery and extend its lifespan.
Basic Operation (LT01)
Changing Gears & Speed Control
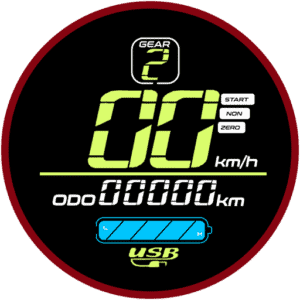
The electric scooter has three gears:
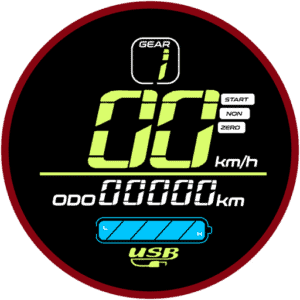
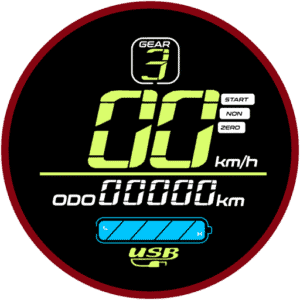
- Gear 1 – Slowest speed
- Gear 2 – Medium speed
- Gear 3 – Maximum speed
To switch between the gears, first, press the ![]() Power Button. This will cause the gear number on the display to flash. While it is flashing, press the
Power Button. This will cause the gear number on the display to flash. While it is flashing, press the ![]() Mode Button to cycle through your preferred gear. To stop the gear from flashing, you can either press the
Mode Button to cycle through your preferred gear. To stop the gear from flashing, you can either press the ![]() Power Button again, or leave it for 2 seconds and it will stop flashing automatically.
Power Button again, or leave it for 2 seconds and it will stop flashing automatically.
Switching Display Modes
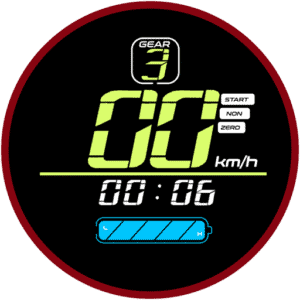
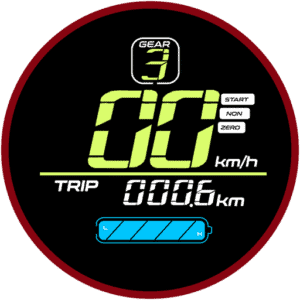
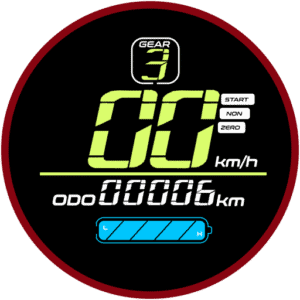
While the scooter is turned ON, pressing the ![]() Mode Button cycles through several parameters that gives you a quick glance at necessary information. The modes will cycle between the following:
Mode Button cycles through several parameters that gives you a quick glance at necessary information. The modes will cycle between the following:
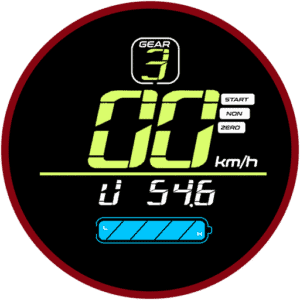
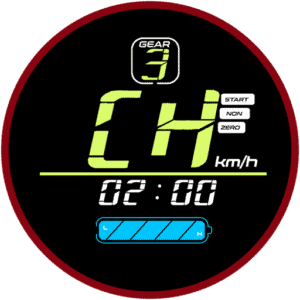
| Mode | Function |
|---|---|
| TIME | Shows how long the electric scooter has been powered on. Resets every time the electric scooter is turned on. |
| TRIP | Displays the distance traveled since you turned the scooter on. Resets every time the electric scooter is turned on. |
| ODOMETER | Indicates the total distance the electric scooter has traveled. |
| VOLTAGE | Shows the current battery voltage. |
| CH 2:00 | Charging mode. Keeps the electric scooter powered ON for 2 hours (overrides auto shut-off setting) so you can use the display’s USB port to charge devices like your phone. |
P-Settings Guide
The P-Settings menu lets you fine-tune advanced settings for your electric scooter. Always double-check settings before riding. If you’re unsure, stick with the factory defaults to keep your electric scooter performing at its best.
How to Access P-Settings (LT01)
Here’s a simple video guide on how to access and edit the P-settings.
To access the P-Settings menu on your electric scooter:
Press and hold the
 Power Button and
  Mode Button simultaneously at the same time for 2 seconds.
This will open the advanced settings menu.Insert the password to enter the P-settings menu.
The default password is 1500. Use the Mode Button to increase the value and
  Power Button to move to the next digit. Once you have entered the password, long press the
  Power Button to enter the P-settings.
Use the
 Mode Button to cycle through the P-settings.
Each press switches to the next setting.To select a setting to change, press the
 Power Button.
Then, adjust the value: Mode Button: Increase the value.
 Power Button: Decrease the value.
To confirm and return to the P-Settings menu, wait 2 seconds.
To exit P-Settings completely and return to normal riding mode, wait another 3 seconds or press the Mode Button and
  Power Button simultaneously again.
Here’s what each P-setting does:
| P-Setting | Function |
|---|---|
| P0 | Tire Diameter Sets the wheel size in inches. This helps the display calculate speed and distance accurately.
|
| P1 | Controller Shut-Down Voltage Sets the minimum voltage at which the controller cuts off power to protect the battery.
|
| P2 | Motor Magnetic Pole Setting Defines the number of magnetic poles in the motor. This affects speed reading accuracy.
|
| P3 | Speed Signal Selection Adjusts how the controller reads the speed signal.
|
| P4 | Unit of Measurement Switch between kilometers and miles for distance and speed display.
|
| P5 | Kick Start Mode Choose how the throttle responds:
|
| P6 | Cruise Control Enable or disable cruise control. If enabled, when cruising at the same speed for 7 seconds, the cruise control will be activated and the electric scooter will continue gliding at the set speed. Hitting the throttle or the brakes will cancel the cruise control operation.
|
| P7 | Initial Acceleration Sets how aggressive the initial take-off is. This adjusts the torque of the electric scooter:
|
| P8 | Electronic Brakes System (EBS) Turns electronic braking on or off. EBS uses electronic signals to control braking force, offering enhanced safety and braking performance in combination with the disc brakes.
|
| P9 | Maximum Power Percentage Limit Sets a limit to the maximum power in percentage. This setting alters the overall performance of the electric scooter, useful if you would like to tame the electric scooter performance for less experienced riders.
|
| PA | Odometer Reset Only usable at factory level for Quality Control (QC) purposes. |
| PB | Auto Power-Off Timer Sets how many minutes the electric scooter stays on when idle before turning off automatically.
|
| PC | Display Brightness Adjusts the brightness level of your display:
|
Make changes only if you understand each option, as incorrect settings may affect performance or safety.
Lighting & Alerts
The Kaabo Skywalker 10C electric scooter includes basic lighting and an alert system to help you ride safely and stay visible.
Headlight & Taillight – Use the ![]() Light Switch on the handlebar to turn the headlight on or off. Always switch it on when riding at night or in low-light conditions to see and be seen. The rear light automatically shines brighter when braking to warn people nearby.
Light Switch on the handlebar to turn the headlight on or off. Always switch it on when riding at night or in low-light conditions to see and be seen. The rear light automatically shines brighter when braking to warn people nearby.
Deck Light – The Skywalker 10C comes with deck lights too. Just use the separate switch on the front right side of the deck to turn them on or off as needed.
Horn – Press the ![]() Horn Button to sound the horn and alert pedestrians, vehicles, or other riders. Use it responsibly to avoid unnecessary disturbance.
Horn Button to sound the horn and alert pedestrians, vehicles, or other riders. Use it responsibly to avoid unnecessary disturbance.
Take The First Ride
How to Ride Your Kaabo Skywalker 10C Electric Scooter Safely
Before hitting the road, take time to get comfortable with your electric scooter in a safe, open area. Follow these steps to start your first ride with confidence.
Practice your first rides in a quiet spot until you feel confident controlling the throttle, brakes, and balance.
Choose A Safe Practice Area
Always practice in a flat, open space that’s free from obstacles, traffic, or slippery surfaces. This helps you learn to balance, steer, and control speed safely.
Starting Your Ride
Power On:
Press and hold the Power Button until the display turns on.
Kick to Start:
Place one foot firmly on the front of the deck. Push off with your other foot to get moving.
Tip: The Kaabo Skywalker 10C electric scooter uses Kick-and-Go mode by default — the throttle only works once the scooter is rolling.Use the Throttle:
Once you’re moving, gently pull the accelerator to increase speed. Lean your body slightly forward for balance as you gain speed.Both Feet On Deck:
Place both feet securely on the deck once you’re moving at a steady pace.
Braking Safely
To slow down, release the throttle and gently pull the brake lever.
Always brake gradually to avoid sudden stops that could wear out the tires or cause you to lose balance.
Remember: The rear light will glow brighter when braking to alert people behind you.
Parking
When you stop:
Power off your electric scooter by long pressing the
 Power Button.
Use the kickstand to keep it upright on flat ground.
Charging the Electric Scooter
Charge your electric scooter when the battery level is low. Do not let the battery drain completely; this helps maintain battery life and performance. The proper sequence of charging is as follows:
Plug the charger to the wall socket first and turn it on.
Check if the LED indicator on the charger has turned green. This indicates that the charger is in standby mode. If the LED is flashing or shows red color, do NOT use the charger as it might be faulty.
Finally, plug in the charger plug into the charging socket of the electric scooter. The LED will now turn red indicating charging sequence.
The LED will automatically turn green once the charging is completed.
Daily Maintenance
Battery Care & Tips
The electric scooter uses a high-quality lithium battery that can be recharged up to 1,000 cycles.
Always plug in the charger to the wall socket first before plugging it into the electric scooter. If the charger is faulty, do not, at any cost, try to plug it in.
Keep your battery fully charged. Lithium-ion batteries have a longer lifespan if they’re charged rather than empty. If you went out riding and still have plenty of charge left, just plug it in and let it charge to full again. Do NOT leave your electric scooter with low battery level.
If you won’t use your electric scooter for a long time, charge it at least once a month to maintain battery health.
Do not leave the charger plugged in for too long (weeks or months) after the battery is fully charged.
- Over time, your battery will experience degradation. This does not necessarily mean that your battery is spoilt. It just means that it requires recalibration and balancing. Jerung Wheels highly recommend you to do this process at least once a year or 1500km whichever comes first. Bring it to our experts at Jerung Medic to get this done. Do NOT attempt it yourself as these batteries are extremely dangerous if handled improperly.
Keep Your Electric Scooter in Top Shape
Regular maintenance keeps your electric scooter safe, smooth, and performing at its best. Follow these simple tips to extend its lifespan.
Lubrication
Re-lubricate the mechanically moving parts every six months to keep its operation smooth.
Avoid using WD-40 or general-purpose sprays — use proper lubricants suitable for electric scooter parts.
Tyres
Check your tires regularly for wear, cracks, or punctures.
Make sure your tires are properly inflated if they’re pneumatic. This helps maintain ride comfort and safety.
Replace worn or damaged tires promptly.
- You can find replacement tyres & tubes for your electric scooter and schedule for installation with our Jerung Medic if necessary here.
Brakes
Test your brakes before each ride.
If braking feels weaker or takes longer, adjust the regulator nut on the rear wheel to fine-tune brake sensitivity. If your electric scooter uses hydraulic brakes, they require brake bleeding to improve the braking performance.
If your brakes are squeaking, you may need to replace the brake pads or the disc caliper might require realignment or replacement.
Get your brakes professionally serviced if needed.
Keep It Clean
Wipe down your electric scooter regularly to remove dust and dirt.
Avoid spraying water directly onto electrical parts. Use foam and dry cloth to clean it instead.
Store your electric scooter in a dry place. Avoid direct sunlight and rain as much as possible.
Always do a quick pre-ride check — test the brakes, lights, horn, and tire condition before hitting the road.
Troubleshooting
If your electric scooter isn’t working as expected, you may check these common points. If none of these seem to fix the problem, please reach out to our Jerung Medic to get them fixed by our trained professional.
My electric scooter won’t power on.
Make sure the battery is charged.
Check the Power Button — press and hold for at least 3 seconds.
Inspect all hubs and connectors for loose or dirty connections.
The display turns on, but my electric scooter won’t move.
Check if the throttle works: remember, the default is Kick Start mode — you must push off before the throttle engages.
Make sure the brake lever isn’t stuck in the engaged position.
The brakes feel weak.
Adjust the rear brake’s regulator nut to improve sensitivity.
Check the brake pads for wear and replace them if needed.
- If your electric scooter uses hydraulic brakes, you may need to bleed them.
The lights or horn don’t work.
Check connections for loose wires.
Ensure your battery isn’t too low — some features may stop working when power is very low.
The battery doesn’t hold charge well anymore.
This may happen if the battery is nearing the end of its life cycle (up to 1,000 charges).
Your battery might need to be recalibrated and balanced. Send it to Jerung Medic to get it fixed.
Error Codes (LT01)
Troubleshooting LT01 Display Faults on Electric Scooter
If your electric scooter’s display shows an error code, don’t panic — this guide explains what each code means and how to do basic checks yourself.
Always switch off your electric scooter and unplug it before inspecting wires or connections.
If you’re unsure or the fault continues after basic checks, we strongly recommend contacting our Jerung Medic for professional help.
Take clear photos or videos of your display and any wires or parts you check.
| Error Code | Description | Action |
|---|---|---|
| E06 | Low voltage protection. | Troubleshoot |
| E07 | Motor hall sensor fault code. | Troubleshoot |
| E08 | Throttle related fault code. | Troubleshoot |
| E09 | Controller related fault code. | Troubleshoot |
| E10 | Communication related fault code. | Troubleshoot |
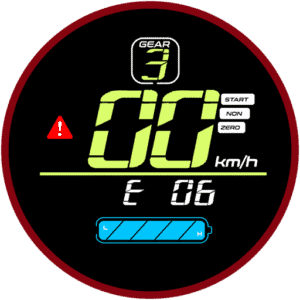
Error code E06 indicates low voltage protection.
Your battery voltage is too low or the display voltage setting is incorrect.
Step 1 – Battery is depleted
This error commonly pops when your electric scooter’s battery is close to depletion. Plug in the charger and fill up the battery. The error should disappear.
Step 2 – Incorrect P-settings
If the battery is already fully charged and Error Code E06 still appears, check your P-settings. They might be incorrect. Enter the P-settings and go to P1 setting which indicates the controller shut down voltage. Now, depending on your electric scooter voltage, you may need to set the following parameters:
| Voltage | Setting |
|---|---|
| 36V | 31.5 |
| 48V | 42.5 |
| 52V | 43.5 |
| 60V | 53.0 |
Step 3 – Faulty Controller
If the electric scooter is fully charged and the setting is correct but the code stays, the controller may be faulty. For dual motor electric scooters, it will be the controller-A that will need to be replaced. Please contact us to get it fixed.
This guide is for general troubleshooting only. Some steps, like checking wires or changing controllers, can be dangerous if you’re not familiar with electrical parts and will void your warranty.
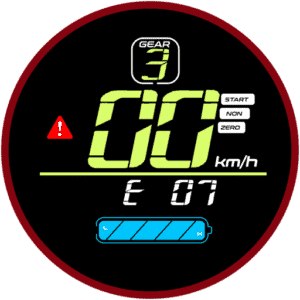
Error code E07 indicates motor hall sensor fault.
There’s an issue with the motor’s Hall sensor connection.
Step 1 – Problem at motor Hall wire
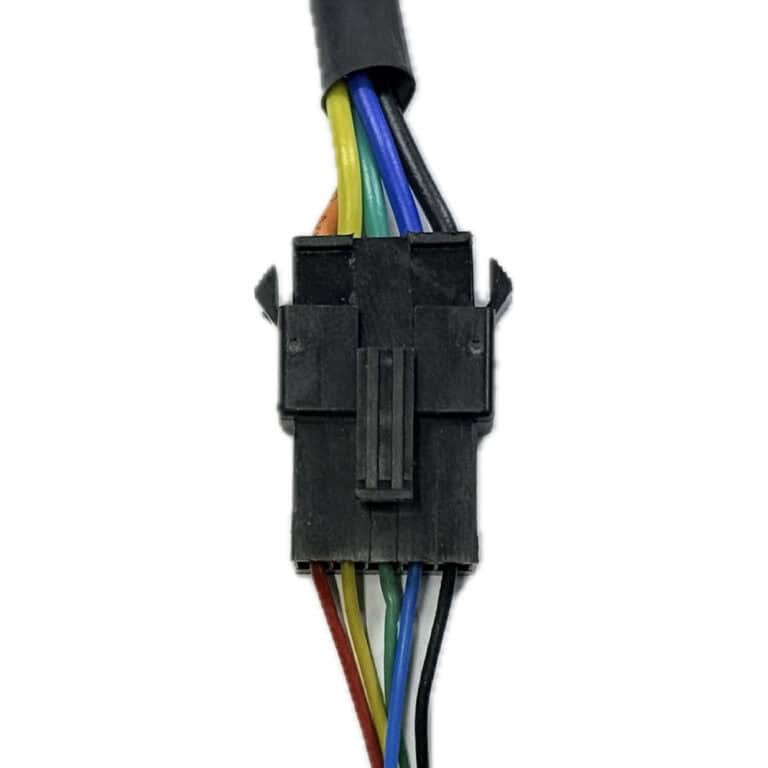
- Open the battery compartment. Check the motor Hall wire and make sure it’s plugged in firmly.
- You might also want to check if the motor Hall wire is torn and the copper is exposed. You may use high temperature resistant insulating tape or heat shrink to wrap around the damages.
Step 2 – Controller / Motor problem
If the wiring looks fine and the error E07 persists:
Single Motor Electric Scooter – Replace the controller first. If the error still shows, replace the motor.
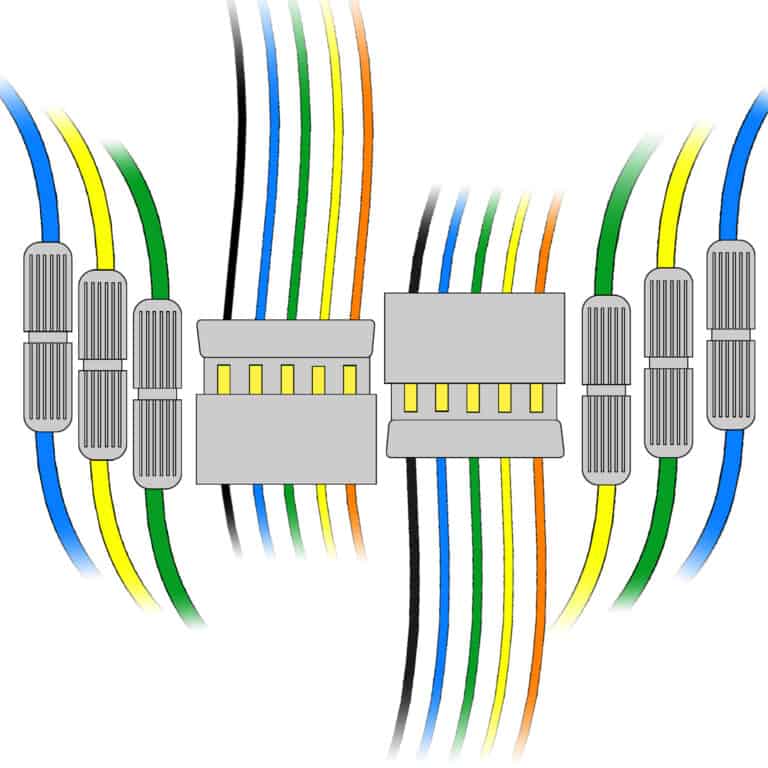
Dual Motor Electric Scooter – Dual motor electric scooters have two controllers and motors. Try swapping the motor cables between front and rear. If the code disappears when swapped, replace the faulty motor or controller as needed. (Note: When swapping, connect the motor phase wires exactly as originally installed. Do not mismatch the wire colors. The green and yellow being cross connected is NOT an error.)
This guide is for general troubleshooting only. Some steps, like checking wires or changing controllers, can be dangerous if you’re not familiar with electrical parts and will void your warranty.
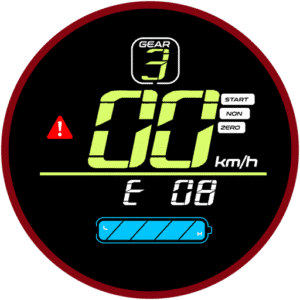
Error code E08 indicates throttle fault code.
There’s a problem with the throttle signal.
Step 1 – Phase wire modifications
If you’ve modified the wiring or replaced parts recently, restore the wiring to factory condition first before checking.
Step 2 – Waterproof plug wire bending
The LT01 throttle is connected using waterproof plugs that have connecting pins within. Often times, if the plug is disconnected and reconnected, improper insertion may lead to bent pins.
Check the display’s waterproof plug for bent pins and straighten them carefully.
Step 3 – Display problem
If the waterproof plug is fine, the next possibility is the LT01 display throttle being faulty. Try replacing the LT01 display throttle and see if that fixes the problem.
Step 4 – Realign the XHB/8 wire
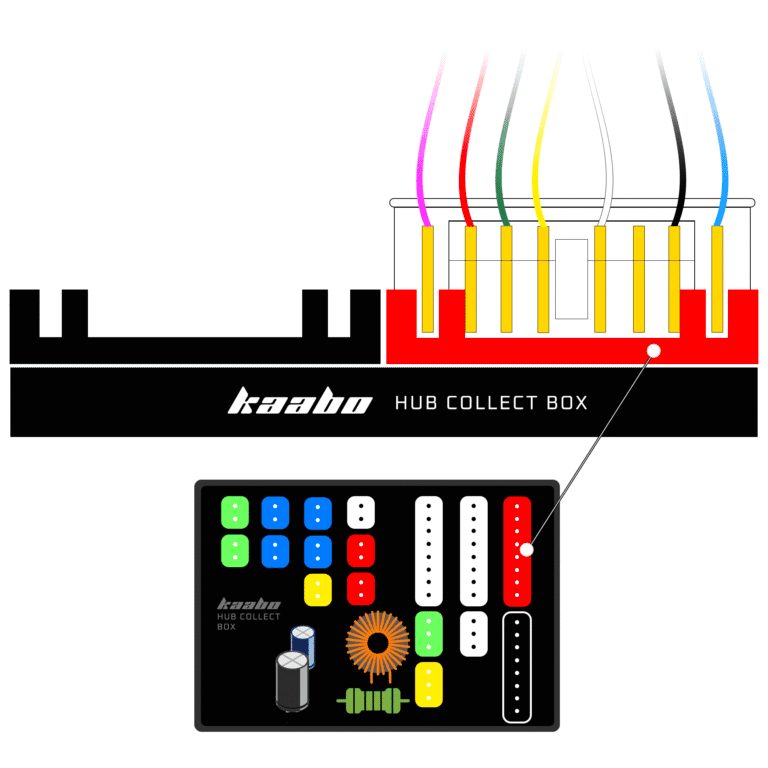
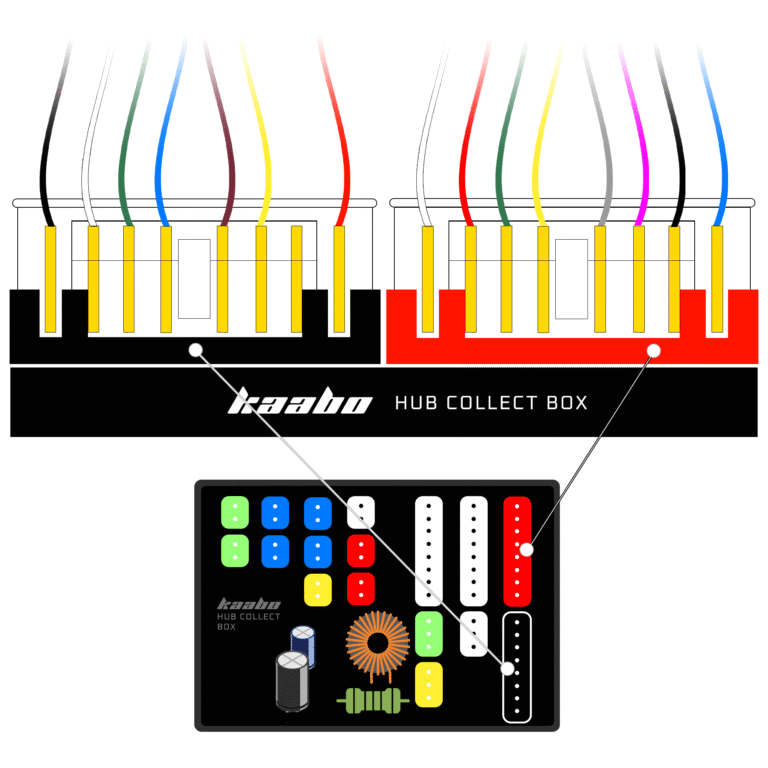
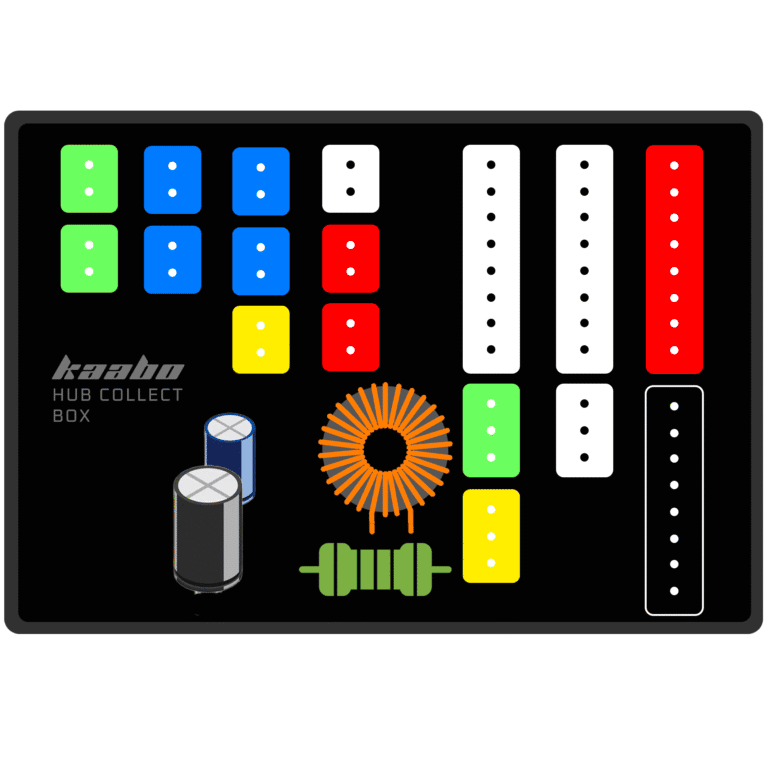
If the display is working fine, open the deck and check the green wire at the XHB/8 core terminal that connects to the collect box.
Gently pull the wire to see if its loose, and insert it tightly, ensuring its properly connected.
Step 5 – Controller problem
If the steps above so far have not proved to be the reason, its possible that the controller-A is faulty. Replace the controller and check if that solves the problem.
Step 6 – Phase wire
If all above are not producing any results, the problem could be somewhere in the phase wire (instrument main line).
Replace the entire phase wire with a new one, the problem should be solved.
This guide is for general troubleshooting only. Some steps, like checking wires or changing controllers, can be dangerous if you’re not familiar with electrical parts and will void your warranty.
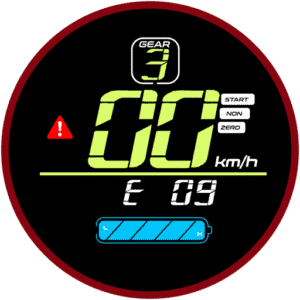
Error code E09 indicates controller fault code.
There’s a problem with the controller.
Step 1 – Check the wires
Check if the cable on the controller terminal is loose. Tighten all the connectors and make sure all wires are properly inserted in their sockets.
Step 2 – Controller faulty
If the wires are all properly inserted and you’re still getting the error, replace the controller.
This guide is for general troubleshooting only. Some steps, like checking wires or changing controllers, can be dangerous if you’re not familiar with electrical parts and will void your warranty.
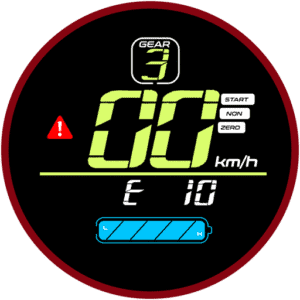
Error code E10 indicates communication fault code.
There’s a problem with the electronics communication protocol.
Step 1 – Phase wire modifications
If you’ve modified the wiring or replaced parts recently, restore the wiring to factory condition first before checking. The added electronic equipment might be causing interference.
Step 2 – Waterproof plug wire bending
The LT01 throttle is connected using waterproof plugs that have connecting pins within. Often times, if the plug is disconnected and reconnected, improper insertion may lead to bent pins.
Check the display’s waterproof plug for bent pins and straighten them carefully.
Step 3 – Realign the XHB/8 wire
Open the deck and check the wires at the XHB/8 core terminal that connects to the collect box. Depending on your electric scooter configuration, you may need to check the Yellow and Red wires.
Gently pull the wire to see if they’re loose, and insert it tightly, ensuring they’re properly connected.
Step 4 – Controller problem
If the steps above so far have not proved to be the reason, its possible that the controller-A is faulty. Replace the controller and check if that solves the problem.
Step 5 – Phase wire
If the controller is fine, the problem could be somewhere in the phase wire (instrument main line).
Replace the entire phase wire with a new one, and see if the problem gets fixed.
Step 6 – Collect box faulty
If the problem still exists, the collect box might be faulty. Replace the collect box and see if the error disappears.
Note: There are different variations of collect boxes, please make sure you get the correct one.
Step 6 – Motor faulty
In rare cases, faulty motors can also cause E10 error, although the probability is very low. If all of the steps are not proving as a solution, you may want to check the motor too.
This guide is for general troubleshooting only. Some steps, like checking wires or changing controllers, can be dangerous if you’re not familiar with electrical parts and will void your warranty.


